

RestingVermin
-
Posts
272 -
Joined
-
Last visited
-
Days Won
5
Content Type
Profiles
Forums
Calendar
Tutorials
Downloads
Gallery
Posts posted by RestingVermin
-
-
Thank you!
How do I lean the front a bit on the upper part? I know I have to select the part but I cant figure out how to ''lean'' it
-
48 minutes ago, itchboy said:
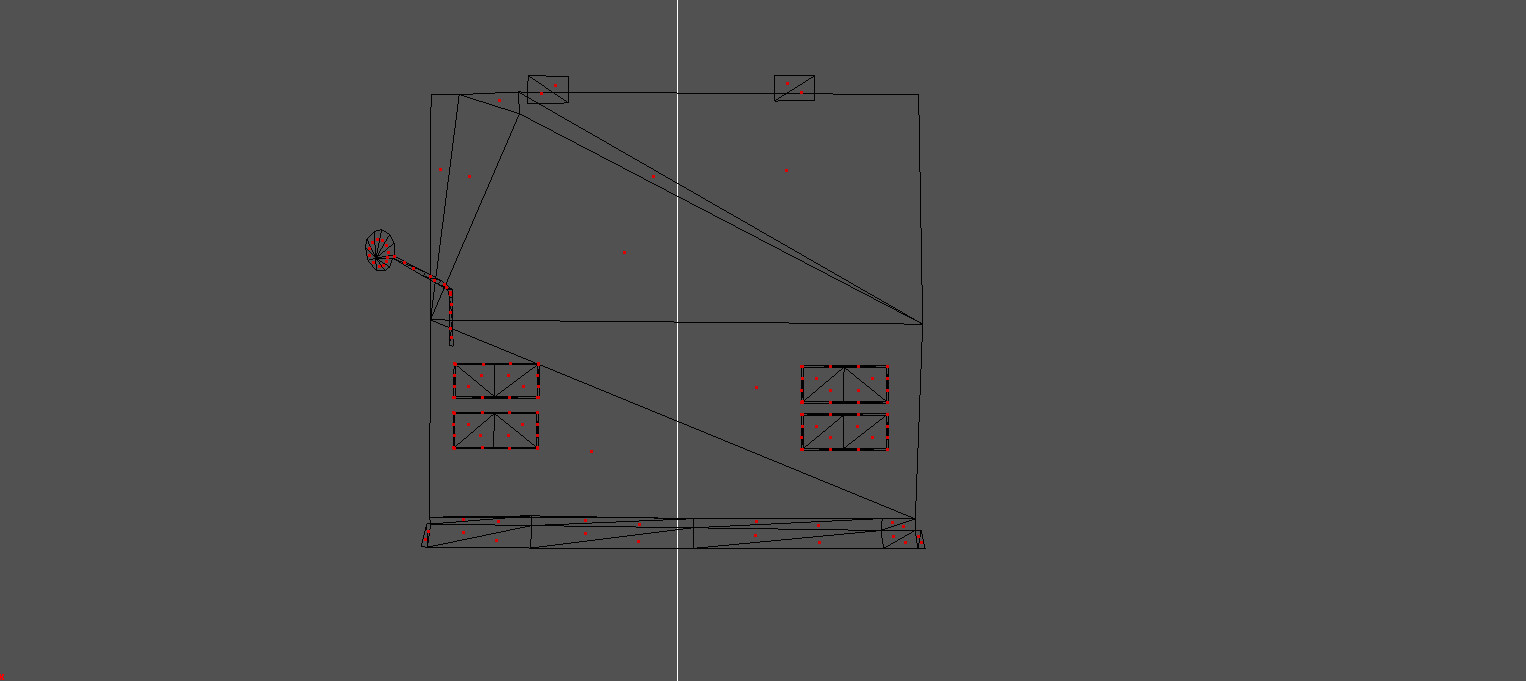
When building a model, do only 'half' of it. Make both sides symmetrical, and use the mirror modifier to make the other side. Your front looks much more optimized now, but Id advise splitting it down the middle.
It would be recommended to do it in this method, that way you only need to spend time modelling half the front (rear and top as well) and simply can mirror it to the other side and instantly have a full vehicle.
http://www.emergency-planet.com/uploads/monthly_2016_06/Untitled.png.9ec70c456f448f9a94c306a3a0c59073.png
aahh ok thanks!
-
On 6/27/2016 at 10:45 PM, MikeyPI said:
Reinforcing what Itch already said, you want to cut the fat from the model now before you shape it out.. It's alot easier to shape a model if its got less verts to jumble together, esp if most of them will end up removed in the end. Because this game doesnt use a draw distance type of deal it means pieces while attached to the model base do not have to be made of one solid object. The game won't "clip" away pieces which "float" over the body, so things like equipment, lights in particular, antennas, mirrors etc don't have to be modeled into the core body of the vehicle. They can instead float into the body saving a ton of polygons and effort in shaping those areas where they would attach.
Door lines do not have to exist in this game, and really should not exist because it's a ton of waste polygons. Instead expect to texture that seam line on since it can still look good but won't waste weight in doing it that way. The curvature on the cab and the bumper both have way too many polygons.. If it's a relatively "flat" shape don't put in too many polys, save the polygons for where they have to be used. Takes a good while of practice and trial and error to figure it out but given time you'll get it. Some things have to be more detailed than others, but often times you can get away with skimping and it still will look fine in the game.
I attached an example of what itch and I have spoken about to help you understand it, hopefull it helps give you an idea of what we were talking about.
http://www.emergency-planet.com/uploads/monthly_2016_06/ex.png.fab873a5451435339cb7f6dbdf4deda0.png
Thanks again! I did a lot of ''cleaning'' on it and has less polys now.
I've started on the front and this is what I've got. I'm still working on it but is this way less polys than it should be?
-
Oh ok thanks!
Back to the first question I had about how to ''copy-paste'' it to the other side. I don't know how to copy the whole thing. I have highlighted all the polys but how do I do from here?
-
2 minutes ago, MikeyPI said:
1). Press and hold CTRL and use the RMB to de-select things... If selection mode is on sometimes it interferes with actions so you may have to disable SEL mode to deselect some things. Annoying but a thing that does happen.
2).Not a very clear question but i'm guessing what you're saying is you built the part but it's faces are facing the opposite direction. In poly edit mode select the polys in question, make sure selected mode is on and use the Modify>Flip function. This will flip the faces to face the opposite direction. If you mean it's physically built in the wrong side/place, that is done by using the mirror function to invert the object (very similar to how you clone half and use mirror to flip it's component so it's facing the opposite way) Once it is mirrored it still has to have the flip function applied since it will appear inside-out.
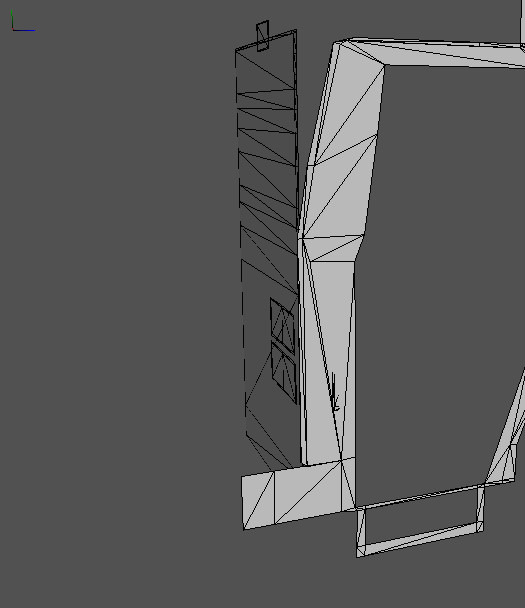
If you see on this picture. The smaller model (from the brooklyn mod) is the other way around while mine is the opposite. How do I do that. I tried the above but it din't work.
-
3 minutes ago, goog said:
Just letting you know this model is already made,if you want it just PM me and I'll give it to you.It'll save you time on making a duplicate model...great job you've done so far on it though.
*I can't remember the guys name but he released this years ago to the forum.*
Thanks! I do know that it is already made. It is in both the Brooklyn mod as well as in the Manhattan mod. I enjoy making models and I'm in the process of learning. My goal with this mod is that I want to represent mostly my own models and have as few models as possible that aren't made by me. Of course there will be some models left in the mod made by others.
But thanks for the offer and support!
-
 1
1
-
-
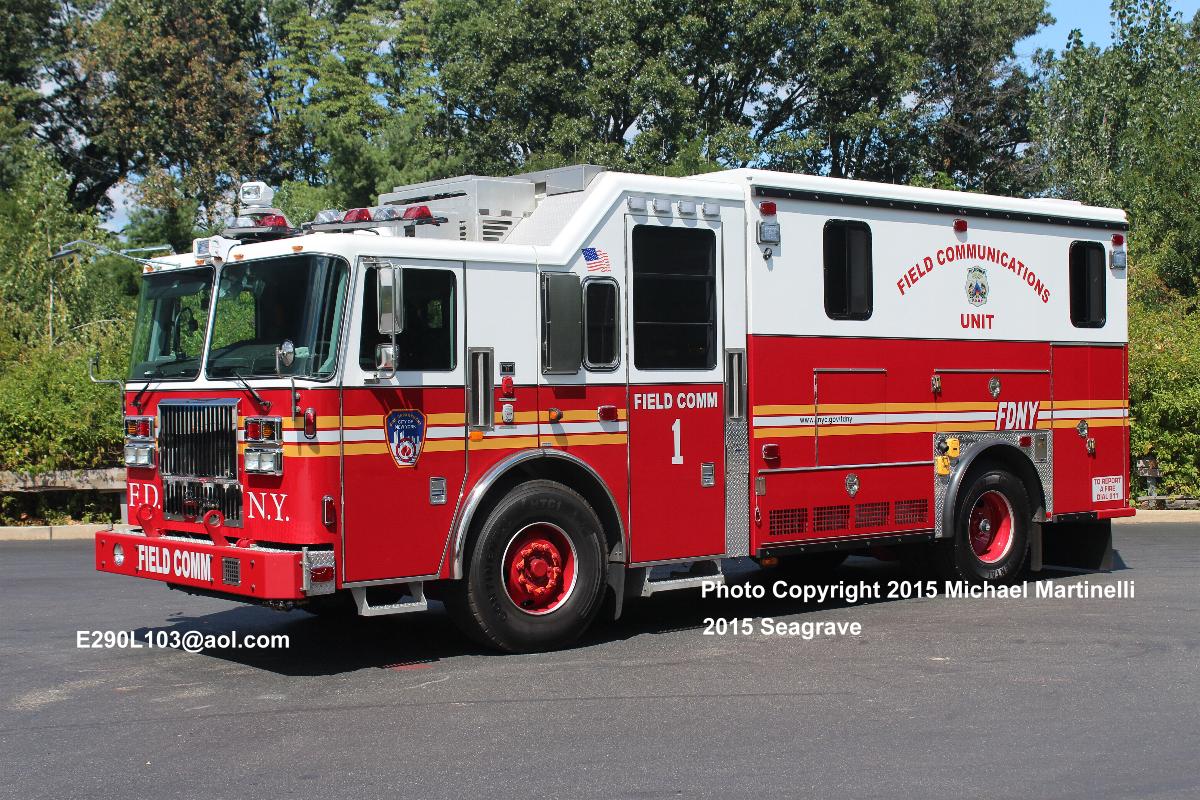
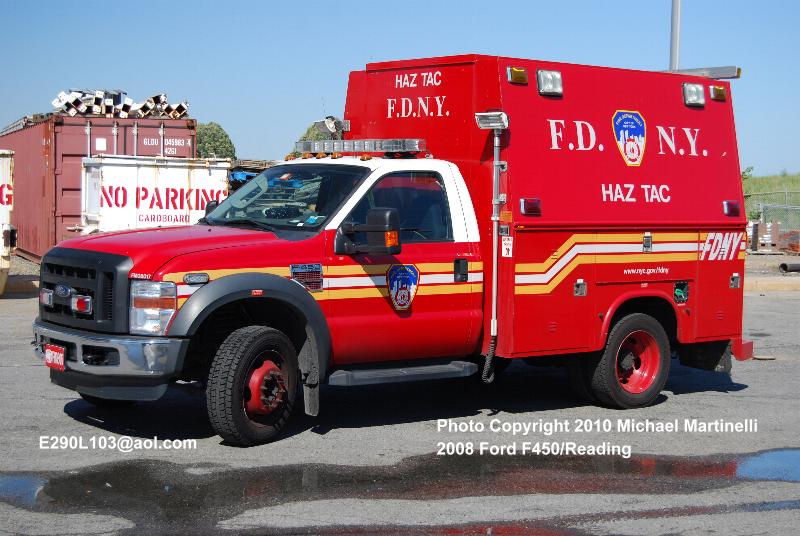
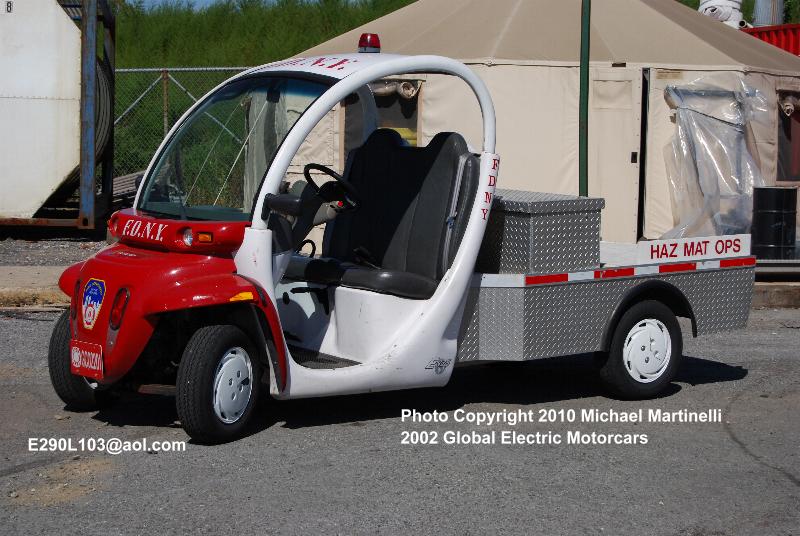
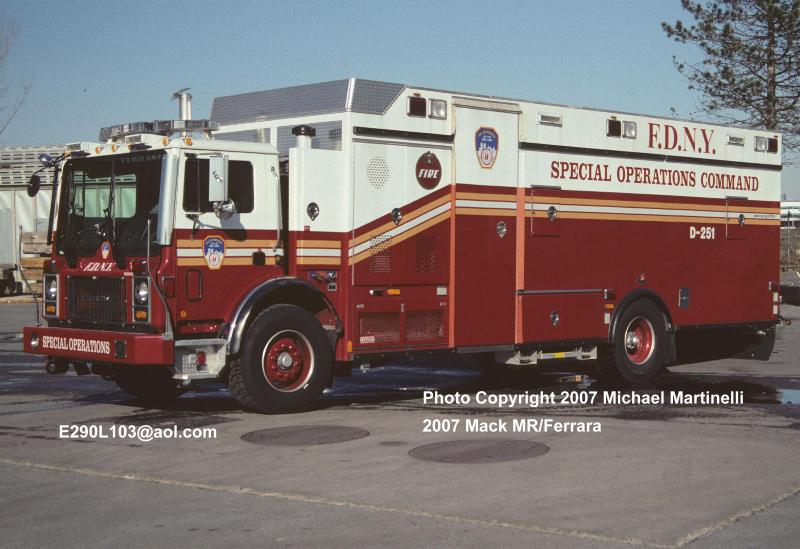
10 minutes ago, Firebuff319 said:
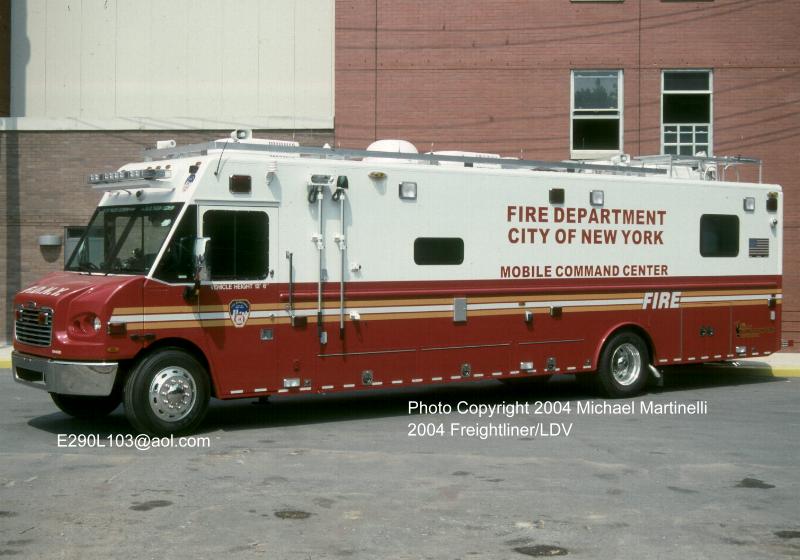
Thank you for the suggestions. I can already tell you that sadly these units will not make an appearance: Amertek, Electric Motorcar and possibly not the mobile command center. Some of these units are also now units that has gotten newer rigs like the hazmat operations unit. But I will make some decisions down the line and add these to my suggestions list and then maybe we could have some polls to make the decisions together. Thanks again!
-
When I highlight an area to extrude it works but I can't ''un-highlight it''
2. I also did the left side on the right side window on zmodeler. How do I fix that so it is correct?
-
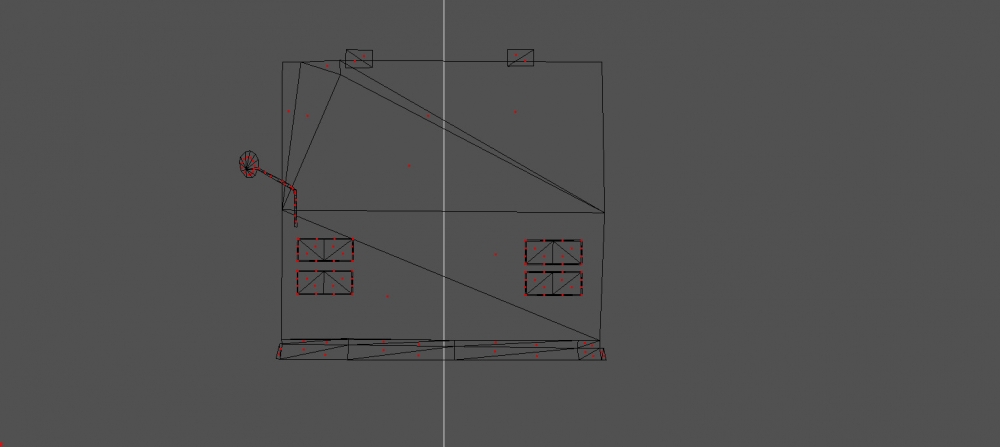
Here is what I've got right now. I'm thinking if I want to remove the emergency lights and add them in as a texture instead. Have not yet decided.
Polys: around 565
Feedback is much appreciated. Now my next thing is to do the front and then the back.
-
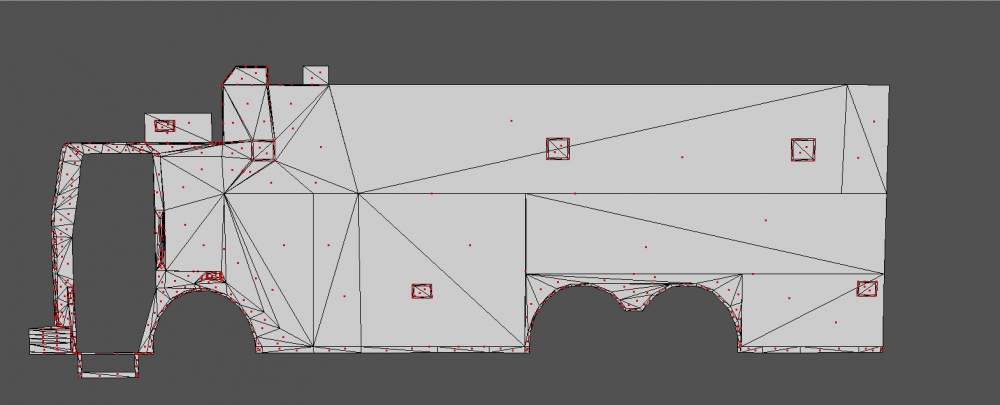
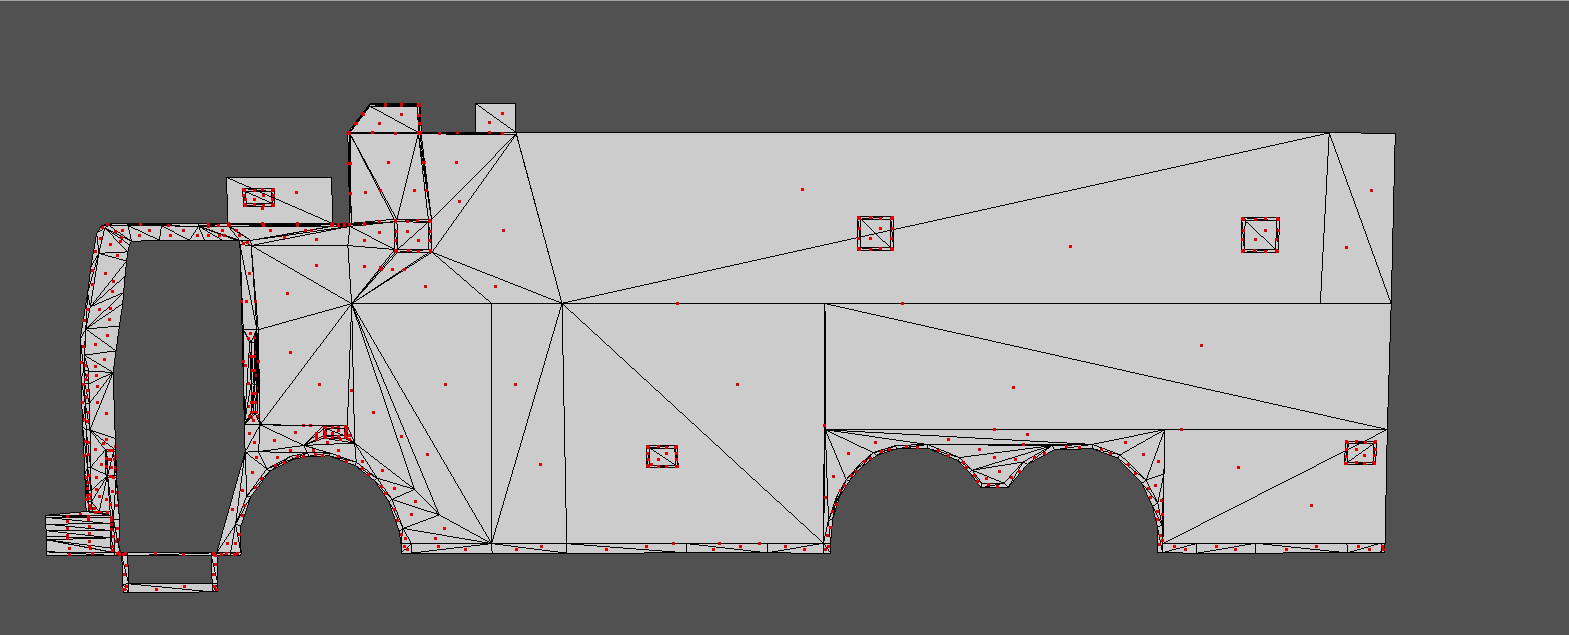
31 minutes ago, itchboy said:
Its looking better this time now. Unfortunately, I've some concerns with your model. Everything's contigouous now and nothing is floating, but its quite poly heavy, and a lot of polygon rows arent necessary. See my marker of your image, then an example of a cab from one of my projects.
Thank you very much for the feedback! I've done the steps and the front wheel archer so it now looks like this.
-
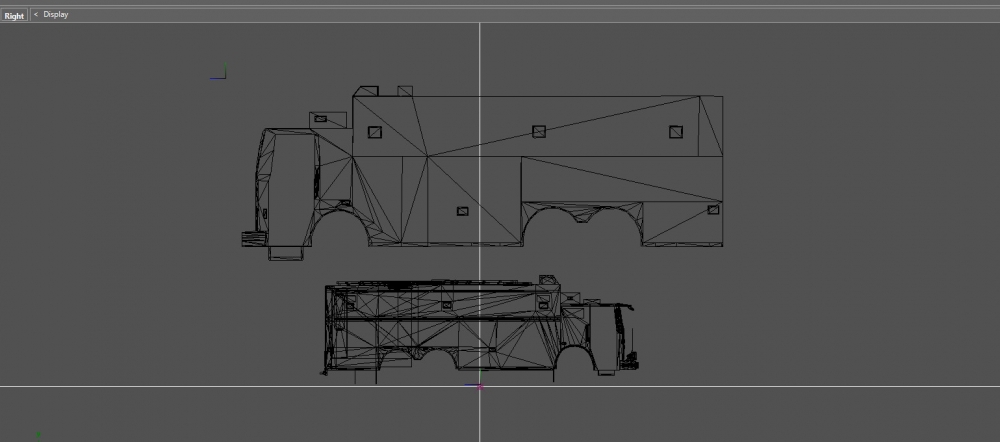
So with a lot of redoing and scratching my head and getting a bit of help with questions I had I finally have a very good start of the model. The image above shows how little detail I did with it but the one below will show that I have done more in depth. Here is how the progress is going at this point. I do have to do the rest of the body and then do the front, back and from above. Let me know what you think so far!
ALSO! I am open for any suggestions for models that you want to see in the mod! Just remember it needs to be units from NYC Bronx!
http://www.emergency-planet.com/uploads/monthly_2016_06/57710b1704996_bandicam2016-06-2713-12-00-158.jpg.bb21635c4fd5d3c0a8c5f6b090b0b345.jpg

-
oh wow that is a lot of helpfull info! Thank you very much!
-
What's the limit for polys for em4? And how many do you usually do itchboy?
-
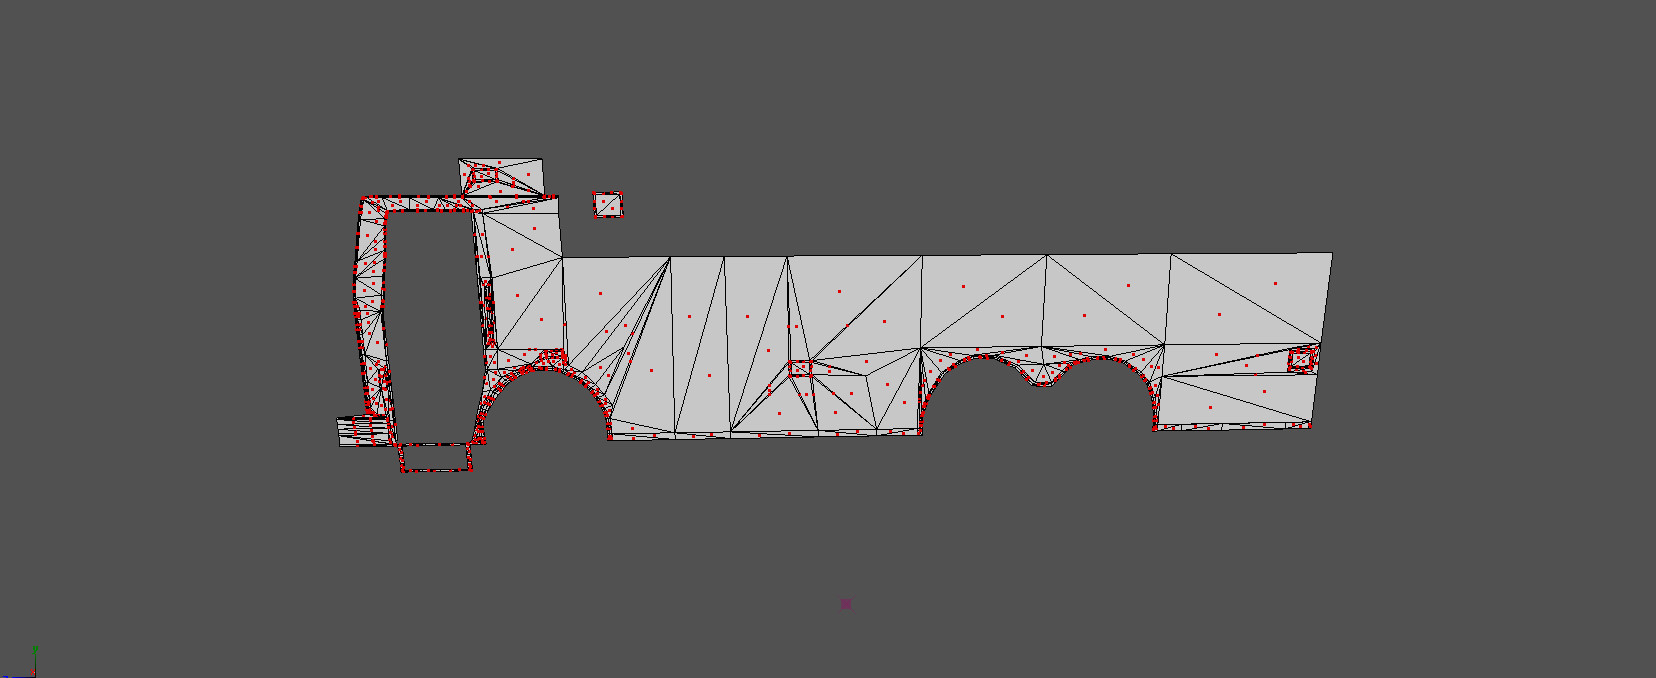
11 minutes ago, itchboy said:
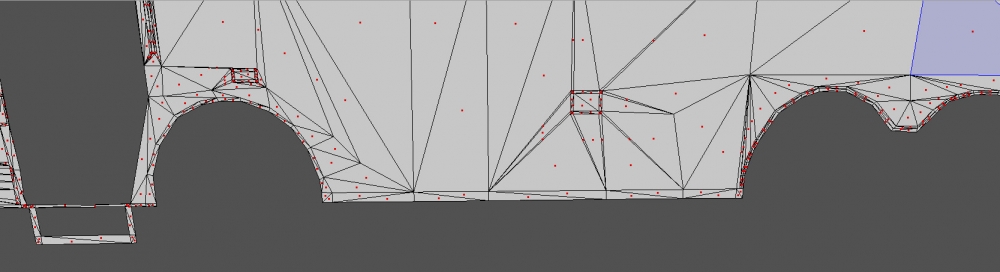
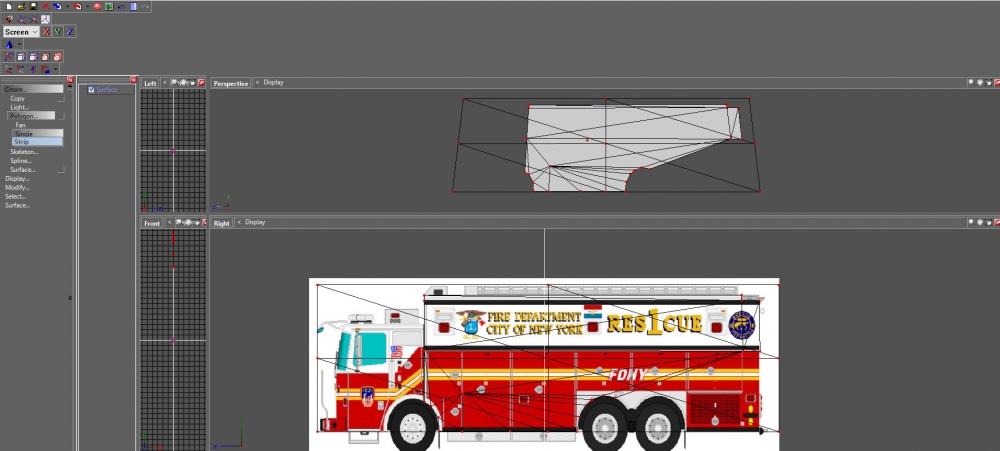
In that particular context, you dont need a grid anymore. You already have the side of the truck modelled out. All you need to do is finish modelling the wheel arches, the panels, and aligning the vertices that need to be straightened out. Your initial 2D mesh is complete when you get to that point.
Making it 3D is a whole other process, and you will need to do a lot of trial and error and moving around with the camera to get it right. Fire engines like that rescue rig tend to be easier builds in my experience, due to them being flat. The best step is to model the cab first, and do the rear box body last, and make sure both are separately modelled, but attached together in the final product.
Oh ok thank you very much. Does is matter if some panels overlay each other?
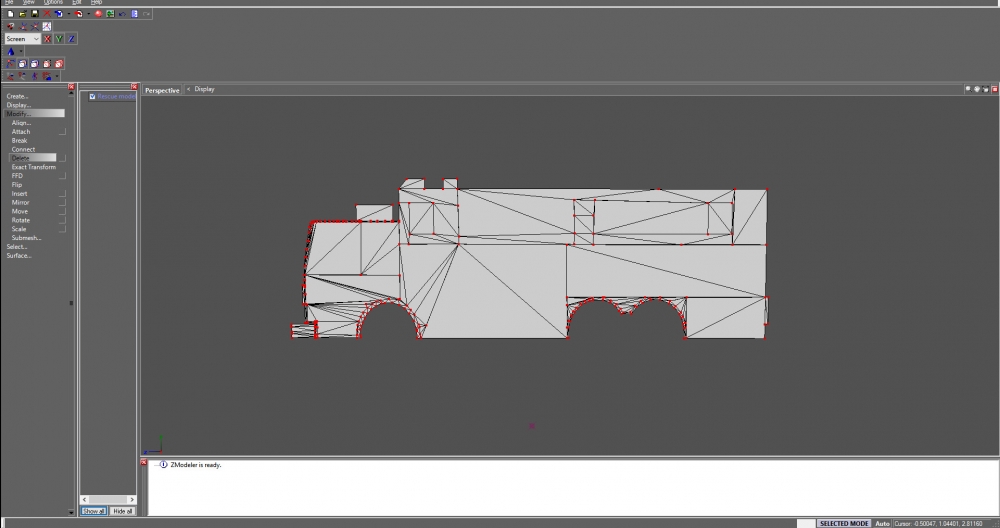
I believe that I'm done with the side at this point and move on to the front and back. It's about 250 vertex's.
http://www.emergency-planet.com/uploads/monthly_2016_06/576e5d842582e_bandicam2016-06-2512-27-36-517.jpg.ad211ddb7feaf26c0f6a4ffeacd16614.jpg
-
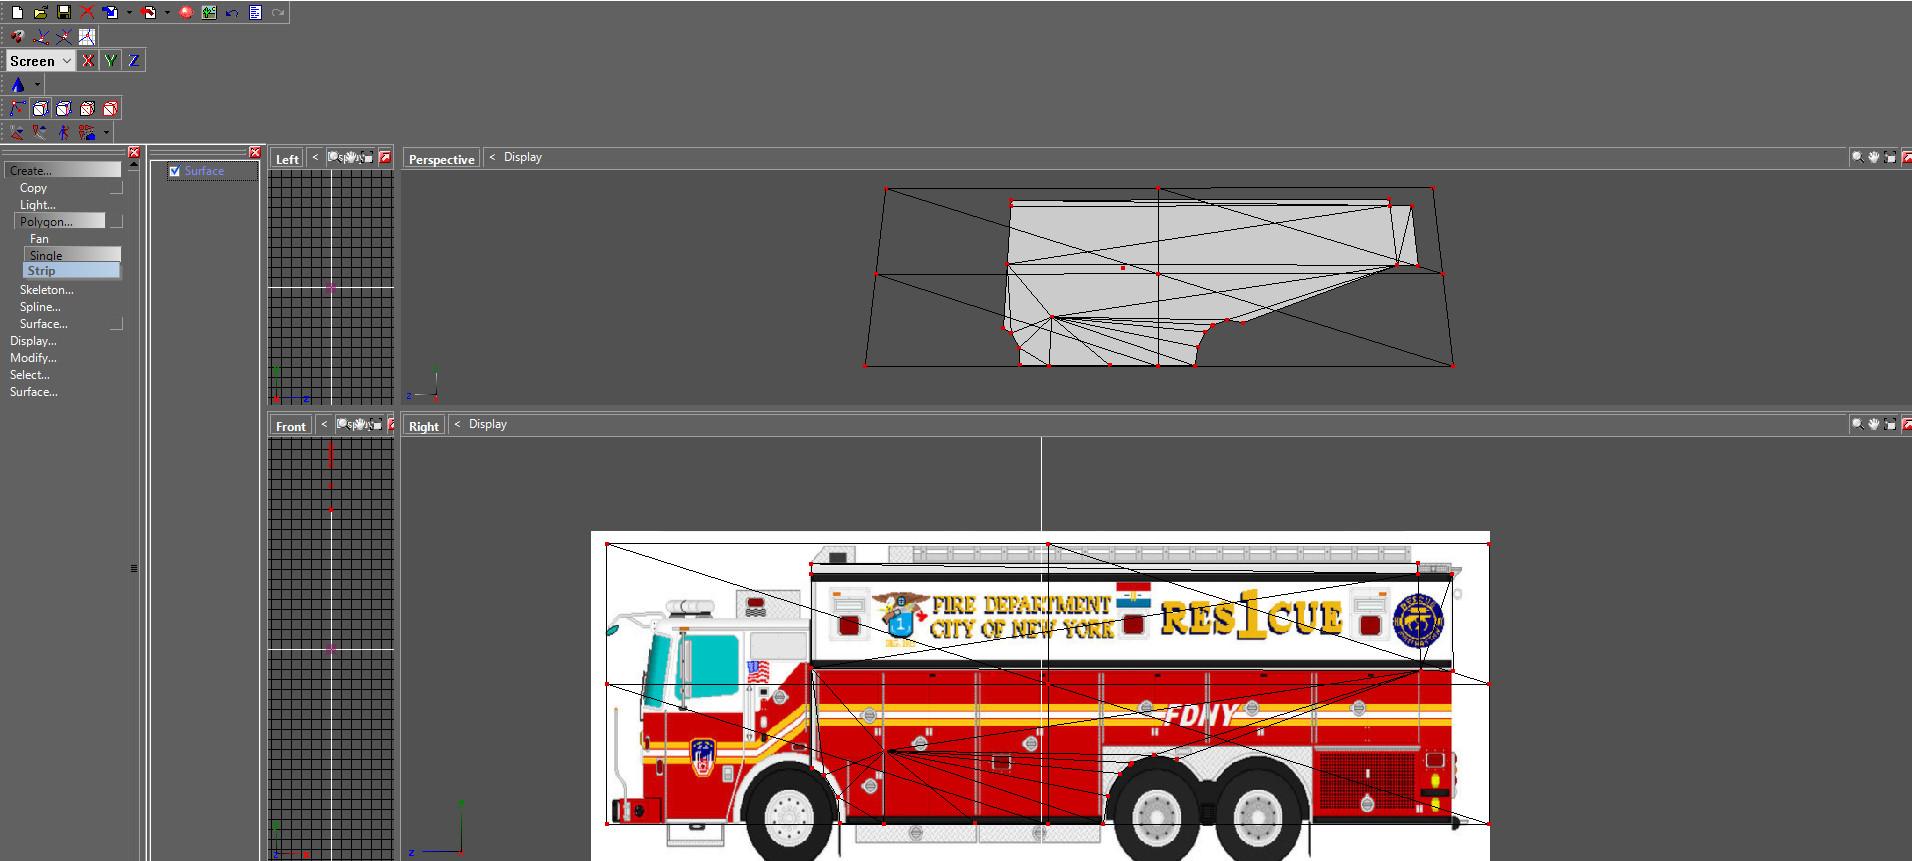
7 hours ago, itchboy said:
Take the entire 'object' of polygons, and make a copy. Then mirror it on the axis to the other side. Attach the copy to the original, and go into vertice edit mode and start welding.
Surface grid is the 'beginning' as explained in my tutorial about modelling from scratch. It aint done yet due to me being unable to sit down and spend the needed one week to finish the model + tut.
oh ok thanks!
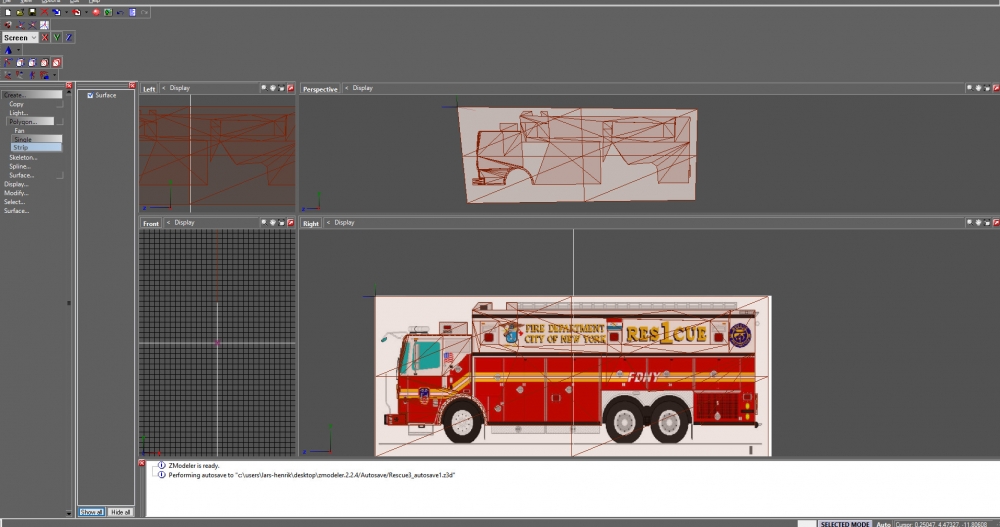
Did I do the surface wrong here?Never mind I did. Can I fix that without deleting the polygons?http://www.emergency-planet.com/uploads/monthly_2016_06/576e419be9294_bandicam2016-06-2510-31-48-044.jpg.1dc13635dfe0c7920761d84e388180f3.jpg
-
So now that I have gotten into some modeling. I thought I'd open a topic where I post what questions I have.
So my first question is. I've done polygons on one side of the model so is there anyway to ''copy-paste'' it so the other side is the exact same? If so please tell me
2. What do I do with the surface grid? Just delete it or move it? (I don't know how)
-
I'm exited to announce that I will be trying to make a good ammount of models for this mod! When I fail I will pick it up again and try even harder the next time! I will make this happen! Any tips then feel free to comment!
-
1
-
-
4 hours ago, Pottyscotty said:
Change the mode from 'Add' to 'Move' and try again.
Got it. Thanks!
-
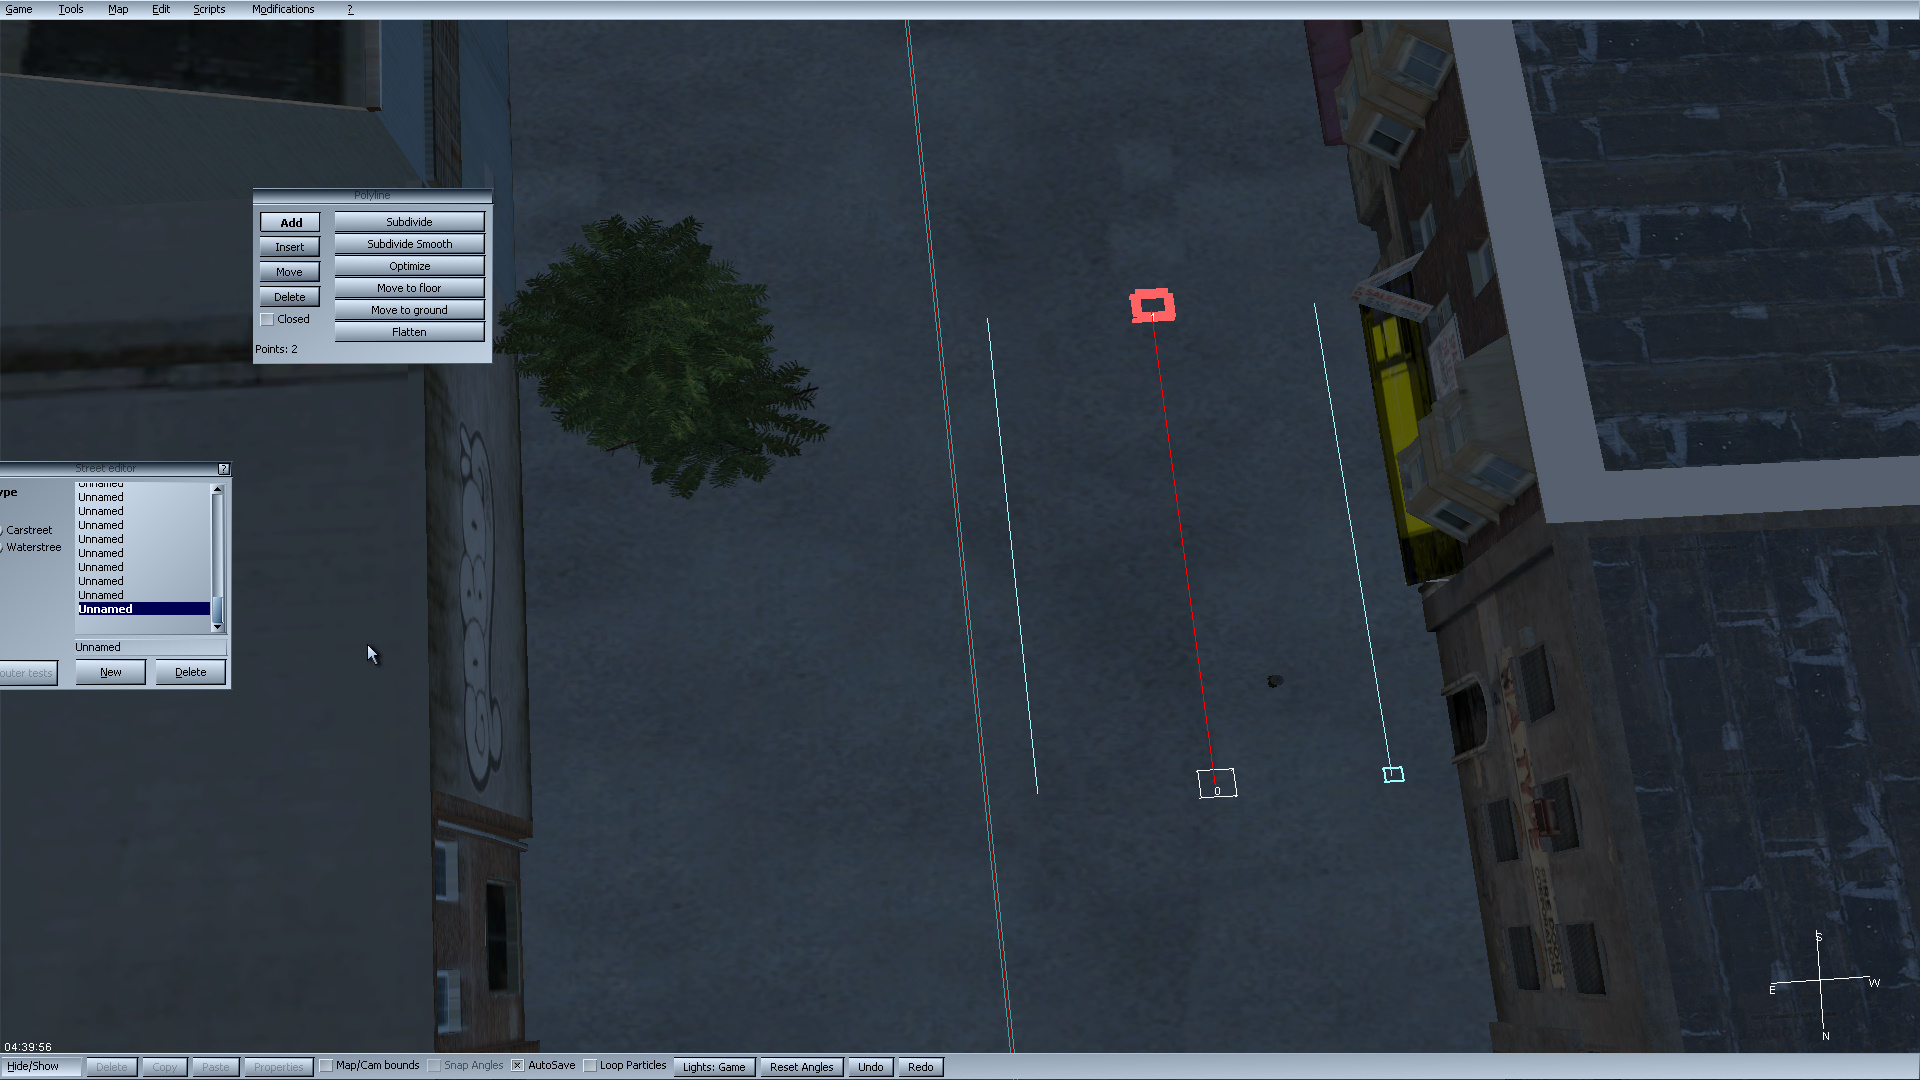
4 minutes ago, Pottyscotty said:
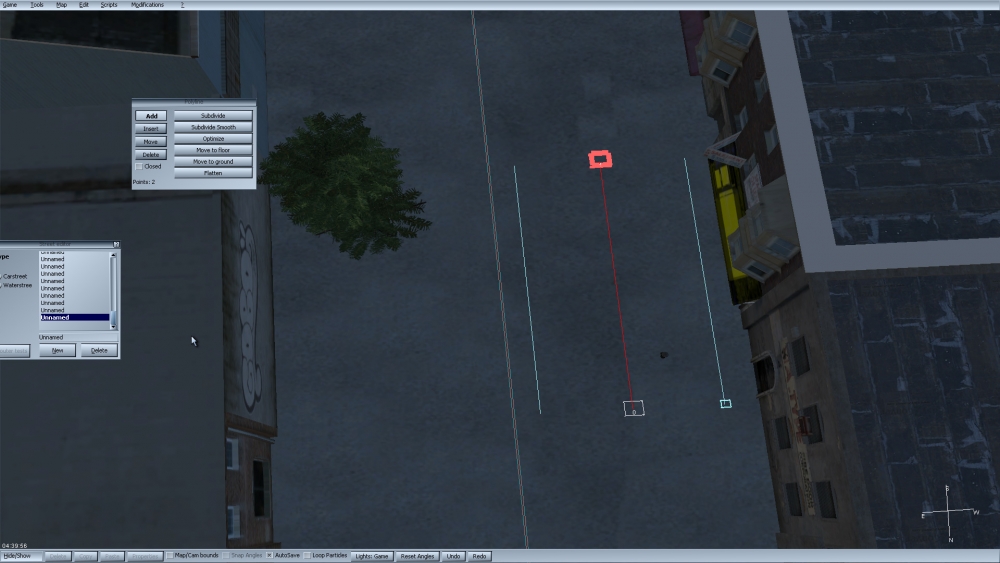
Hold ALT and click and drag the small blue box you can see at the bottom right of the path.
Can't click that box it just adds another red one
-
3 hours ago, itchboy said:
Have you saved it in uncompressed 24 bit?
2 hours ago, Pottyscotty said:Odd, I use Gimp and it works fine. Can't think of any other reason for why it isn't working because I use the same settings.
Do you guys know how I can get the street paths to be smaller so it looks like a line like this? Insted of what I have to the right?
-
Just now, Pottyscotty said:
Odd, I use Gimp and it works fine. Can't think of any other reason for why it isn't working because I use the same settings.
Yeah last time I was doing a texture into the editor I did get that option. I don't know why I don't get it anymore
-
3 minutes ago, itchboy said:
In paint.net at least, you are able to choose 'auto', 32 or 24 bit. Idk about other software so you will have to dig around the program you are using and find the button/feature.
Thank you! I used paint.net and got the option. I used to have that option on gimp but I guess I'll work with paint.net from now on.
-
2 minutes ago, itchboy said:
Have you saved it in uncompressed 24 bit?
I don't remember how to save it as 24bit, no option says so
-
16 minutes ago, Pottyscotty said:
There are three requirements for them so they don't crash:
- It must be in TGA format
- It must not have RLE Compression
- It must be an image which has only one layer that has no alpha value. Most image editors will have a button that does this for you that is labeled 'flatten image'. If not, merge all your layers and then remove its alpha channel. Make sure you save before you do this otherwise you'll lose your layered version.
I've done all that but still crashes


Zmodeler questions
in Modding Related Support
Posted
Currently got that fixed. Got another problem. When I extrude something it wont show up in the 3D view. It will only show ''inside'' the model and not that I've done anything on the ''outside''.