
Firequi
-
Posts
71 -
Joined
-
Last visited
-
Days Won
4
Recent Profile Visitors
4,191 profile views


Firequi's Achievements
")


-

Project NYstalgia - A retro themed New York City modification.
Firequi replied to CanadianFrog's topic in Mods
Looks really good so far! Love the retro vibe already! -
Version 1.0.0
19 downloads
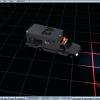
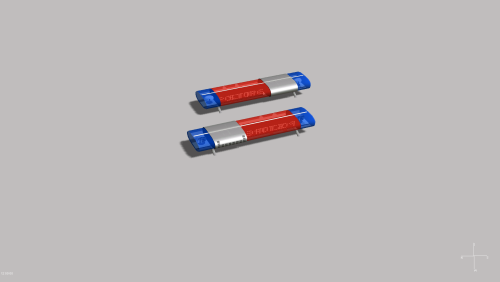
The Aerodynic 24SHSP, the lightbar produced by Federal Signal for the Dutch Police. This lightbar was used by Dutch forces during the 80s and 90s. Included in the download are off course the model. the lightmaps for the stop sign and the authantical siren. The lightbar is scaled to person size. De Aerodynic 24SHSP, de lichtbalk geproduceerd door Federal Signal voor de Nederlandse politie. Deze lichtbalk werd veel gebruikt tijdens de 80er en 90er jaren. In deze download vind je natuurlijk het model maar ook de lightmaps voor de stopborden en de authentieke sirene. Deze balk is op personenformaat gescaled. Der Aerodynic 24SHSP, ein Lichtbalken erstellt von Federal Signals für die niederländische Polizei. War weitverbreitet in den 1980er und 1990er. Beinhaltet sind natürlich das Model, Lightmaps für das Stopschild und das Originale Sondersignal. Er ist auf Personengröße skaliert. -

Version 1.0.0
12 downloads
Residential building that can be found in Dutch towns and cities. -
Hi there, sounds like the pivot of the wheels has moved. The pivot has to be in the center of the wheel, otherwise the rotation around the pivot will cause the effect that you describe. To fix it you need to import the wheel in a 3D program (e.g. Zmodeler, Blender), move the pivot to the center of the wheel and export the wheel as .v3o again.
-
It's not about liking the rules too much, it's about respecting the creator and respecting the creator's wishes.
-
The basic approach isn't actually that hard. The fist step would be to save it as the freeplay map and remove the mission bound persons/vehicles/objects from the map. Since the map boundaries are already in place, the medical calls and fire calls should work right away. MVA's, protests, gas-explosions etc you would need to implement yourself, I believe there are good tutorials on that available. Probably some additional unit spawn and exit points are required as well, since not every unit is available in the mission, this is all described in the Editor manual. And off course further customization such as stations etc that you would like to have on the map you would need to place them yourself and set up the required virtual objects and triggers for the scripts.
-
Version 1.0.0
27 downloads
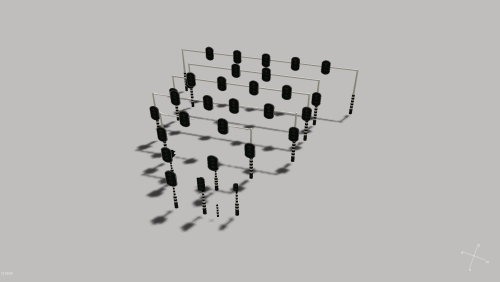
A Dutch Traffic Light set, already lighted. To use these models in your Mod, you only need to copy the folders into your own mod folder. Important: It is required to also copy the Textures folder because this folder contains lightmaps that are used by the models. Een Nederlandse verkeerslichten set, al voorzien van lights. Om deze in je mod te plaatsen is het voldoende om de mappen uit de set in je mod te plaatsen. Belangrijk: De textures map moet ook meegenomen worden omdat daar gebruikte Lightmaps in zitten. A Dutch Traffic Light set, already lighted. To use these models in your Mod, you only need to copy the folders into your own mod folder. Important: It is required to also copy the Textures folder because this folder contains lightmaps that are used by the models. Read me: EN - To use these models in your mod, a listing would be enjoyable, but it is not required. - These models may only be used for the Emergency game series. - It is not allowed to use these models for monetizing purposes. - 3D model changes are allowed, the changed models need be released to the public however NL - Voor gebruik in je mod is een Readme vermelding leuk, maar niet verplicht - De modellen mogen alleen gebruikt worden voor de Emergency spelreeks - De modellen mogen niet voor commerciële doeleinden gebruikt worden - 3D veranderingen mag je doen, deze moeten wel voor de community beschikbaar gesteld worden DE - Für Benützung in deiner Mod freu ich mich über einen Eintrag, ist aber keine Pflicht - Die Modelle dürfen nur für die Emergency Spielreihe benutzt werden. - Die Modelle dürfen nicht für Kommerzielle Zwecken verwendet werden - 3D Änderungen sind erlaubt, müssen aber die Community zur Verfügung gestellt werden -
I believe it should be System::Log instead of LogFile
-
Well, looking at the state of your main EM4 folder and the stuff scattered in the several folders that you show, this is not entirely true. Installing mods to EM4 is really simple, just follow these basic rules: Don't put maps in you base folder, it won't work there and only clutters the whole folder. Don't put stuff in you Data folder .e4mod files are actual mod files that will be recognized by the EM4 Modinstaller and install themselves in the correct way via the mod-installer Mods only work and are only recognized by EM4 if they follow this folder structure: "your folder structure before EM4"\Emergency 4 or Emergency 4 Deluxe of First Responders 911\Mods\"Your mod name here". All the data of the mod should obviously be located in the mods folder If you download a mod folder that is an actual folder, just place the entire mod-folder in the said Mods folder. Make sure that, if extracted from a .rar package (or something like that), you place the actual mod folder in the EM4 Mods folder and not the mod folder hidden in a same name folder that was created via extraction. E.g. \Mods\Example_Mod\Example_Mod\Files won't work, it always has to be \Mods\Example_Mod\Files Like Itchboy said, clean up your folders first and I personally would recommend to only place actual mod folders in the EM4 folder structure and keep the downloaded .rar or .e4mod files at a different location, so you keep your EM4 folders clear from useless files. Regarding the resolution issue, is you game started as administrator? That solves a lot of EM4 issues normally.
-
Turn off the alpha reflections, you can find that under the edit menu in the editor.
-
Looking at that mod on YT, you can see that the videos are 10 years old and the lights say that too. Nevertheless, if you want to increase the brightness, you could increase the size of the corona, but that will not look that good in my opinion. My advise would be to add polygon lights if those are not already there and if there are already, you could clone those to increase the brightness and intensity.
-
Buildings that collapse when completely burned?
Firequi replied to BGM17's topic in Modding Related Support
Yes you can, when you open the edit menu of the building that you would like to change in the editor, you can see that there are three options to add a .v3o file to the prototype. If you add a file to that as well, EM4 will use that model in the full burned stated instead of the default, dark smut. Same goes for the half burned state off course. -
Well you were on the right track by copying the files. Basically what you want to do is to chose one of the versions and rename them. You then assign the correct, copied, v3o file to the copied prototype file via the editor. After that you just add a line for the fourth version in the portraits file (with the correct file path for the prototype) and create a new units folder with the files in there as well. Also in those files you fill in the correct path for the prototype. Then make sure to change the Unit ID so the game actually recognises that a new unit is in town and add that Unit ID to the unit files of some cars as well in order to actually select them ingame. TLDR: Just proceed like you normally would when adding a new unit to the game and rename everything correctly.
- 1 reply
-
- 1
-

-
For that you need the original .tga map texture and edit that with a program like GIMP or Photoshop. After the edits you need to import the texture into the editor again in order to replace the texture ingame.
-
You should use Zmodeler 3 instead of 2. In 3 you need to make sure that the .vmo file is in the same folder as the v3o file but it will show you the model correctly as this version keeps the bone structure during the import. That is something Zmodeler 2 isn't capable of.